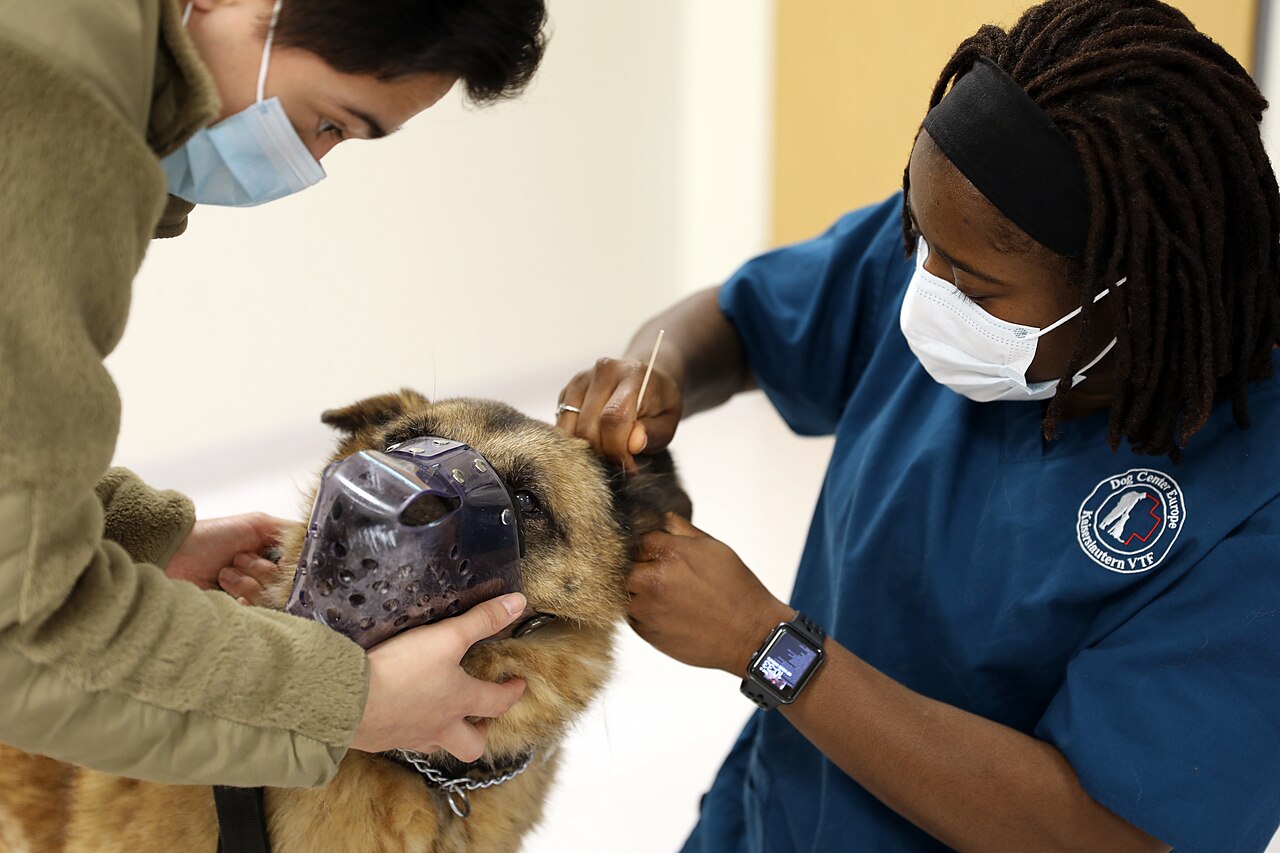
- Why Regular Dog Ear Cleaning Matters
- Understanding Your Dog's Ear Anatomy
- Vertical and Horizontal Canals
- The Role of Ear Wax
- When to Clean Your Dog's Ears
- Signs That Cleaning Is Needed
- Frequency Recommendations
- Supplies You'll Need for Safe Dog Ear Cleaning
- The Dog Ear Cleaning Process: Step by Step
- Step 1: Prepare and Position Your Dog
- Step 2: Apply the Cleaning Solution
- Step 3: Massage the Base of the Ear
- Step 4: Let Your Dog Shake Its Head
- Step 5: Wipe the Visible Area
- Step 6: Dry and Reward
- Common Mistakes to Avoid During Dog Ear Cleaning
- When to Skip Dog Ear Cleaning and See a Vet
- Signs of Infection
- Allergies and Underlying Conditions
- Conclusion: Maintaining Ear Health for a Happy Dog
- ❓ Frequently Asked Questions
Regular dog ear cleaning is a cornerstone of responsible pet ownership, yet many owners are unsure how to do it properly. Done correctly, it prevents painful infections, removes excess wax and debris, and helps you catch early signs of trouble. But get it wrong—using the wrong solution or poking too deep—and you can cause injury or push debris further into the ear canal. This guide walks you through every step of safe dog ear cleaning at home, backed by veterinary anatomy and real-world experience, so you can keep your dog comfortable and healthy.
Why Regular Dog Ear Cleaning Matters
Dogs have a unique ear structure that makes them prone to build-up and infections. Unlike humans, whose ear canals are relatively straight, a dog's ear canal takes an L-shaped turn—first going vertically down, then horizontally toward the eardrum. This trap-like design prevents debris from falling out naturally. Over time, wax, dirt, moisture, and yeast can accumulate, creating a perfect breeding ground for bacteria and fungi. Breeds with floppy ears—like Cocker Spaniels, Basset Hounds, and Labrador Retrievers—are especially vulnerable because their ear flaps cover the ear opening, reducing airflow and trapping moisture. In fact, a 2019 veterinary study found that floppy-eared breeds have a threefold higher incidence of otitis externa (outer ear infection) compared to prick-eared breeds.
Lifespan and overall health are also tied to ear care. Chronic ear infections, if left untreated, can damage the ear canal, rupture the eardrum, and even spread to the middle or inner ear, causing hearing loss and balance problems. A dog that lives an average of 12 years can suffer needlessly for months or years if ear issues are ignored. Regular cleaning, when done correctly, reduces inflammation, removes irritants, and supports the natural microbiome of the ear—helping your dog live a happier, more comfortable life.
Understanding Your Dog's Ear Anatomy
Before you touch your dog's ear, you need to know what you're working with. The visible part is the pinna (ear flap). Beneath it lies the vertical canal, which descends into the horizontal canal, ending at the eardrum. The length and width of these canals vary by breed: a Cocker Spaniel’s horizontal canal can be 1.5 inches long and very narrow, while a German Shepherd’s canal is shorter and wider. The skin lining the ear canal produces cerumen (ear wax) and houses tiny hairs that help trap debris. Normally, the ear has a self-cleaning mechanism: as old skin cells migrate outward, they carry wax and debris with them. However, this process is slow in dogs, and factors like allergies, swimming, or excessive hair in the ear canal can overwhelm it.
Vertical and Horizontal Canals
The vertical canal runs downward from the ear opening, then bends 90 degrees to become the horizontal canal leading to the eardrum. This bend means that when you clean, you can only see part of the vertical canal. Any cleaning tool inserted too deeply risks hitting the eardrum or scraping the delicate lining. For a medium-sized dog, the total canal depth from opening to eardrum is about 1 to 1.5 inches, but it varies. A safe cleaning depth is never more than the length of the cotton ball or pad you wrap around your finger—just enough to wipe the visible part of the vertical canal.
The Role of Ear Wax
Ear wax is not dirt; it’s a protective secretion that traps foreign particles and repels water. A small amount of light brown or yellow wax is normal. However, dark brown, black, or crumbly wax often signals yeast or bacterial overgrowth. If the wax smells foul or looks like coffee grounds (which could indicate ear mites), cleaning alone won't fix the problem. Behavior clues include head shaking, scratching at the ears, or rubbing the head on furniture. These signs suggest that the natural wax balance is off and cleaning should be approached carefully.
When to Clean Your Dog's Ears
Not every dog needs weekly ear cleaning. Over-cleaning can strip protective oils and disrupt the microbiome, making infections more likely. The right frequency depends on your dog's breed, lifestyle, and health. As a general rule, clean your dog's ears only when you see visible wax or debris, or if your veterinarian recommends a specific schedule. Many dogs with healthy, upright ears never need cleaning beyond what their natural self-cleaning provides. However, dogs that swim frequently, have floppy ears, or suffer from allergies often benefit from monthly or bi-weekly maintenance.
Signs That Cleaning Is Needed
- Visible dirt, wax, or discoloration in the ear canal.
- A mild, waxy odor (a strong or foul smell indicates infection).
- Your dog shakes its head or scratches at its ears more than usual.
- Redness or swelling inside the ear flap.
- Debris visible after a walk through tall grass or sand.
Frequency Recommendations
For dogs with no history of ear issues, a check once a month is sufficient. If you see a little wax, you can clean. For breeds like Cocker Spaniels or Basset Hounds, weekly to bi-weekly cleaning is common. Dogs that swim in lakes, ponds, or the ocean should have their ears dried and cleaned after each swim, as trapped water promotes bacterial growth. Likewise, dogs with food allergies or environmental allergies often produce more wax; their cleaning frequency may need to increase during allergy seasons. Always consult your vet before starting a routine, especially if your dog has had ear infections in the past.
Supplies You'll Need for Safe Dog Ear Cleaning
Using the right tools makes dog ear cleaning safe and effective. Never use cotton swabs (Q-tips), as they can push debris deeper and damage the canal. Here’s what you should have on hand:
- A veterinarian-recommended ear cleaning solution – Choose a gentle, pH-balanced formula designed for dogs. Avoid solutions with alcohol or hydrogen peroxide, as these can irritate and dry out the ear lining. Look for ingredients like chlorhexidine (antibacterial), ketoconazole (antifungal), or ceruminolytic agents that break down wax.
- Cotton balls or gauze pads – These are soft and absorbent, perfect for wiping the outer ear and the opening of the vertical canal. Use a fresh ball for each ear to avoid cross-contamination.
- Finger cot or clean finger wrapping – Some owners prefer to wear a disposable finger cot or wrap a piece of gauze around their index finger for better control.
- Towel or cloth – Dog ear cleaning can get messy; have an old towel ready to catch drips and to wipe your dog’s head afterward.
- Treats – Positive reinforcement is essential. Offering a high-value treat before, during, and after the process makes it a less stressful experience.
Optional but useful: ear powder for dogs with heavily haired ear canals. It dries the hair and helps you grip debris. Also, a helper for large or nervous dogs—one person holds and distracts while the other cleans.
The Dog Ear Cleaning Process: Step by Step
Now that you have your supplies and know the anatomy, follow this careful process for safe dog ear cleaning. Perform cleaning in a quiet area with good lighting. If your dog is anxious, do a few practice sessions where you simply lift the ear flap and offer a treat, before introducing the solution.
Step 1: Prepare and Position Your Dog
Place your dog on a non-slip surface like a bath mat or carpet. For small dogs, you can hold them on your lap. For larger dogs, have them sit or lie down with you kneeling beside them. If your dog tends to squirm, enlist a helper to hold the body and offer treats. Gently lift the ear flap so the ear canal opening is exposed. Observe the inside: note the color, amount of wax, and any redness or discharge.
Step 2: Apply the Cleaning Solution
Hold the ear cleaning solution bottle above the ear canal (not touching it, to avoid contamination). Squeeze a generous amount (enough to fill the vertical canal fully—typically about 1–2 teaspoons for a medium dog). Do not insert the tip of the bottle into the ear. Your dog will feel the liquid and may shake its head; that’s normal and helps loosen debris.
Step 3: Massage the Base of the Ear
Once the solution is in, close the ear flap with your hand and gently massage the base of the ear for 20–30 seconds. You should hear a squishing sound. The massage helps the solution break up wax and debris throughout the L-shaped canal. Be gentle but firm—avoid rubbing hard against the ear flap.
Step 4: Let Your Dog Shake Its Head
Release the ear and step back slightly. Your dog will naturally shake its head, which helps bring loosened wax and solution out of the vertical canal. This is the safest way to expel debris from the deep canal without any tools. Have a towel ready to catch the drips.
Step 5: Wipe the Visible Area
Take a dry cotton ball or gauze pad and gently wipe away any remaining solution and debris from the inner ear flap and the opening of the vertical canal. Only go as deep as your finger wrapped in cotton allows—never insert anything past the first knuckle. Use a fresh cotton ball for each swipe. Repeat until the cotton comes away clean. Do not scrub; wiping is sufficient.
Step 6: Dry and Reward
Use a dry cotton ball to gently remove any excess moisture from the outer ear. Some dogs benefit from a gentle air dry for a minute. Then give your dog a treat and praise. Let them know the session is finished. Clean the other ear using the same steps with a fresh cotton ball and solution.
Common Mistakes to Avoid During Dog Ear Cleaning
Even well-meaning owners can make errors that hurt rather than help. Avoid these pitfalls:
- Using cotton swabs (Q-tips) – They are too thin and can perforate the eardrum or push wax deeper, leading to impacted plugs that require veterinary extraction. Stick to cotton balls or pads.
- Cleaning too often – Daily cleaning can strip the ear’s protective layer and cause irritation. Stick to a schedule based on your dog’s needs, not a fixed routine.
- Pouring solution onto a cotton ball first – This only wipes the outer ear and misses the deep canal. Always flood the canal with solution to allow it to dissolve wax deep inside.
- Ignoring signs of pain – If your dog yelps, pulls away, or becomes aggressive when you touch the ear, stop immediately. Pain could indicate an ear infection, injury, or foreign body. Forcing cleaning can worsen the problem.
- Using home remedies like vinegar or alcohol – These can burn inflamed skin and disrupt pH balance. Only use vet-approved ear cleaning solutions.
- Forgetting to dry after swimming – Moisture trapped in the ear canal is a leading cause of otitis externa. Use a drying ear solution after water exposure.
Behavioral facts: Dogs that have had a bad experience with ear cleaning may develop a lasting fear, making future cleaning difficult. Always keep sessions short, positive, and reward-heavy. If your dog shows extreme distress, consult a professional groomer or veterinarian for handling tips.
When to Skip Dog Ear Cleaning and See a Vet
Sometimes, home dog ear cleaning is contraindicated. Certain conditions require veterinary diagnosis and treatment before any cleaning is attempted. If you notice any of the following, stop and make an appointment:
Signs of Infection
- Strong, foul, or yeasty odor coming from the ear.
- Thick, dark, or pus-like discharge (yellow, green, or bloody).
- Redness, swelling, or heat in the ear flap or canal.
- Your dog constantly shakes its head or tilts it to one side.
- Scabs, crusts, or hair loss around the ear.
Infections often require prescription ear drops, antibiotics, antifungals, or even ear flushes under sedation. Cleaning before treatment can spread infection deeper. Additionally, if your dog has a foreign body (like a grass awn), cleaning may push it further in.
Allergies and Underlying Conditions
Chronic ear issues are often linked to food allergies or environmental atopy. A dog that needs cleaning more than once a week, or that has recurrent infections, likely has an underlying allergy. Diet plays a role: omega-3 fatty acids (from fish oil) can reduce inflammation, but the root cause must be identified. Other conditions like hypothyroidism, autoimmune diseases, or polyps can also manifest as ear problems. Your veterinarian can perform cytology, culture, or imaging to diagnose the true cause.
Lifespan impact: Untreated ear infections can lead to chronic changes in the ear canal, such as fibrosis and calcification, which narrow the canal and make future infections inevitable. Surgery may eventually be required. Early veterinary intervention prevents this decline.
Conclusion: Maintaining Ear Health for a Happy Dog
Safe and effective dog ear cleaning at home is a skill that every owner can learn—but it requires patience, proper technique, and the right supplies. By understanding your dog’s ear anatomy, recognizing when cleaning is truly needed, and following the step-by-step process outlined here, you can reduce the risk of painful infections and keep your dog comfortable. Always prioritize your dog’s comfort; if cleaning becomes a battle or you see concerning signs, seek veterinary guidance. Regular ear checks (once a week) coupled with sensible cleaning (only when necessary) will support your dog’s overall health and longevity. A calm, positive approach—with treats and gentle handling—turns ear cleaning into a bonding experience rather than a chore. Your dog’s ears will thank you with a happy, itch-free life.
❓ Frequently Asked Questions
💬 How often should I clean my dog's ears?
Most dogs with healthy ears need cleaning only once a month or after swimming or bathing. Dogs prone to ear infections or those with floppy ears may require weekly cleaning, but always follow your vet's advice to avoid over-cleaning.
💬 What supplies do I need to clean my dog's ears at home?
You'll need a veterinarian-recommended ear cleaning solution, cotton balls or gauze pads (never cotton swabs, which can push debris deeper), and treats to reward your dog. Avoid using alcohol or hydrogen peroxide as they can irritate the ear canal.
💬 Can I use hydrogen peroxide or alcohol to clean my dog's ears?
No. Hydrogen peroxide and alcohol can sting, irritate the delicate ear tissue, and slow healing if there's an infection. Always use a pH-balanced, alcohol-free ear cleaner specifically formulated for dogs.
💬 What are signs my dog has an ear infection instead of just dirty ears?
Signs of infection include redness, swelling, a strong or yeasty odor, discharge that looks like pus or dark wax, constant head shaking or scratching, and pain when touching the ear. If you notice these, stop cleaning and see your vet.